How to run graphical applications in Windows 10 subsystem for Linux (WSL2)
Preamble
In the web, there are plenty of guides and tutorials about how to install and run the subsystem for Linux in Windows 10 (WLS2), and also about running applications with a graphical interface (GUI). I am no expert in the field and, therefore, I have nothing to add to what can already be found via any common search engine.
On the other hand, reading and following some of the guides I found, I managed (with some issues) to do almost everything I needed, except running programs with graphical interface: I could not find a way to make things work.
Having the Linux bash available in Windows was anyway useful to me, I could do some things, for example quick operations on csv (comma-separated values) files containing experimental data. But, I still wanted the chance to run certain programs with graphical interface.
In particular, years ago I frequently used Gnumeric, which, at that time, was more convenient to me compared to Excel (at least until I managed to handle the fundamentals of VBA, and anyway before the 2013 version). Unfortunately, the release of versions compiled for Windows has been abandoned, so I was stuck with lots of files that I could not easily handle anymore.
Eventually, I did manage to run graphical applications on WSL2, so I wrote down step-by-step the sequence of moves that allowed me reaching this goal, essentially as a reminder to summarize everything I read around and the numerous trials I made.
Table of contents
1) Installing WSL2
It is not really difficult, there are many available guides. For example, at this link you can find one in the official Microsoft website. Steps are rather clear, firstly you have to enable two additional features, namely Virtual Machine Platform (not Hyper-V) and Windows Subsystem for Linux (Fig. 1). To do this, you could probable type “features” in the search bar, then “Turn Windows features on or off” (this is translated from Italian, I cannot double check in an English OS), or type directly “optionalfeatures” and run the command that will appear.

Once it is done, you have to reboot PC (even more times) according to directions, then you have to go to Microsoft Store and look for a Linux distribution (e.g. Ubuntu, Fig. 2), then install it. Once completed, you can run it from Windows menu, thus opening a Linux terminal in a new window.

2) Installing, configuring and running an X server in Windows
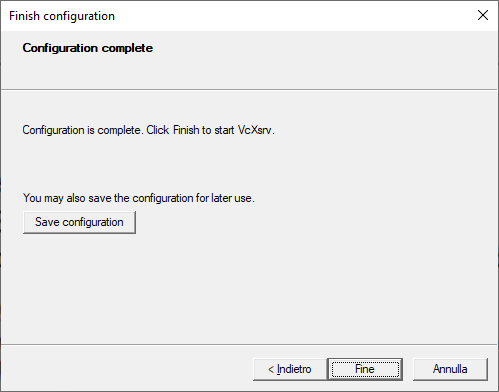
I personally tried Xming and VcXsrv, keeping the latter, but the procedure is practically the same. Once the installation file has been downloaded and installed, you have to run XLaunch (found among the apps, or by typing it in the search bar, see Fig. 3). Then, I left the default setting in the first window (“Select display setting“), i.e. “Multiple windows” with display number –1, and in the second window (“Select how to start clients“), i.e. “Start no client“. At the third windows (“Extra settings“) I put a tick on all three options, i.e. “Clipboard“, “Native openGL” e “Disable access control“. The deactivation of the access control can be alternatively imposed by typing “-ac” inside the cell of additional parameters. In the next and last windows you can save the configuration to a file, if desired, or just click “Finish” to run the X server. The sequence is shown in Figures 4a–4d.


3) Checking that firewall is not blocking the app
To get things working, you have to pay attention that, at the first run of the X server, Windows Firewall asks whether to block or allow the application. However, I think that the permission is applied by default only to the profile related to private networks, being thus the application blocked in public network profiles. Conversely, it is necessary to revise settings and be sure that, among the rules for incoming connections, VcXsrv be allowed also for the public profile, especially the TCP protocol (Fig. 5).

4) Retrieving the IP address assigned to WSL
This can be achieved in different manners, for example using PowerShell or, as in Figure 6, via Windows command prompt, where typing “ipconfig” and taking note of the IPv4 address related to the adapter that contains “WSL” in its description.

5) Running Linux and exporting correctly the parameters
Now, from the Linux terminal (Ubuntu in my case) you have to export the parameter LIBGL_ALWAYS_INDIRECT (only if the option “Native opengl” was checked when configuring the X server, see Fig. 4, otherwise skip it) and the parameter DISPLAY, which has to correspond to the IP address identified at the previous step. To do this, you just need to type the following instructions, pressing “enter” at the end of each one. Obviously, “NNN.NNN.NNN.NNN” has to be replaced with the correct IP found for your machine (see the example in Fig. 7). Pay attention to upper and lower case letters, because the Linux terminal is case-sensitive, differently from the Windows one.
export LIBGL_ALWAYS_INDIRECT=1 [ENTER]
export DISPLAY=NNN.NNN.NNN.NNN:0 [ENTER]
6) Checking the settings
If no issue arose, you can test if everything is working simply running any application with graphical interface that you previously installed. For instance, I tried to run the file manager formerly known as Nautilus (Fig. 8).

7) Running multiple windows
When you run a program with graphical interface, this will open a window but will keep the terminal occupied. To get different programs on multiple windows, a possible solution consists in running programs in background, just adding a space and an ampersand (&) at the end of the instruction line used to launch them.
8) References
Below I collected some links to guides and web pages that I read, among others, to understand how to deal with all this.
- https://docs.microsoft.com/en-us/windows/wsl/install-win10
- https://medium.com/swlh/get-wsl2-working-on-windows-10-2ee84ef8ed43
- https://techcommunity.microsoft.com/t5/windows-dev-appconsult/running-wsl-gui-apps-on-windows-10/ba-p/1493242
- https://x410.dev/cookbook/wsl/using-x410-with-wsl2/
- https://skeptric.com/wsl2-xserver/
- https://stackoverflow.com/questions/61110603/how-to-set-up-working-x11-forwarding-on-wsl2
- https://www.thegeekdiary.com/understanding-the-job-control-commands-in-linux-bg-fg-and-ctrlz/
First release: 11 December 2020 | Last update: 3 April 2021